
← The Journal
Hatching Coturnix
This is a reflection of our first hatch and not necessarily a how-to guide; I plan to replace this document in the future as I become more confident and experienced in the process.
In spring of 2023 we completed our very first incubation and hatching of quail. We ordered Jumbo Brown Coturnix quail eggs from a reputable hatchery that carries the James Marie Farm bloodlines. If you do any amount of research on quail breeding, you'll find that the JMF name comes up again and again. They are the gold standard for quality quail genetics - in both disposition and health. While I don't think you can buy directly from JMF he has a number of partner hatcheries, most small-scale, offering the bloodline to hobbyist and commercial growers alike. We started with the homestead package which included 15 eggs (kindly, the hatchery sent 20).
Our setup
We used a Little Giant 9200 still-air incubator and the Little Giant 6200 egg turner with the small cups for quail or bantams. Both of these products were purchased in the late 90s (when I was a kid), but both still functioned exactly as designed. The egg turner rotates the eggs 45 degrees every hour, completing the full rotation every 4 hours. It prevents you from having to open the incubator to manually rotate them which would cause both the temperature and humidity to decrease while doing so. After testing both parts to ensure they were working correctly, I washed all the parts and pieces as instructed by the manufacturer. I added 3 different thermometers and a hygrometer to the incubator to ensure I had a good read on both temperature and humidity throughout incubation and hatching.
The incubator was kept on a desk, away from drafts or sunlight, and the room was kept at a comfortable temperature. I ran a humidifier nearby throughout the entire hatch which I found helped with keeping the internal incubator humidity more stable.
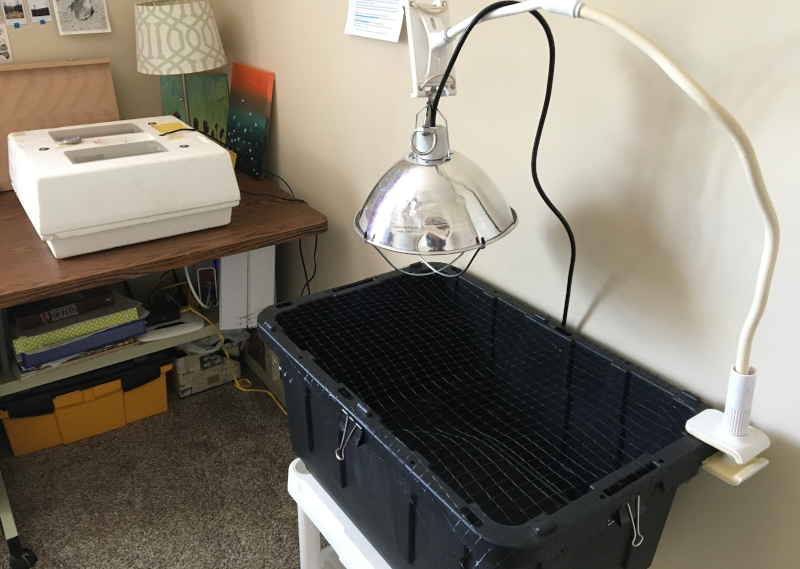
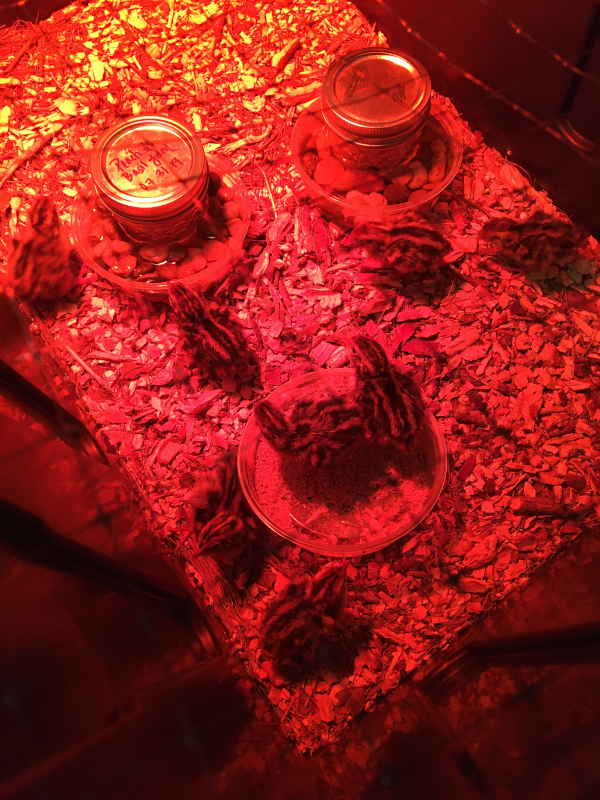
Our brooder is a very basic, low-cost setup using a large storage tote, a heat lamp, a thermometer, pine shavings, and plastic netting for the cover. We started with a small 15 gallon tote, later moving them to a larger one as they grew and we needed space to separate chicks for special care, but more on that later.
The water dishes are about 1" deep by 5" diameter, filled with small stones, and a small jam jar to prevent them from standing in it and/or drowning. Quail chicks are notorious for harming themselves.
Incubation
We pre-ordered our eggs in January and had them scheduled to ship in May. I chose to hatch in May vs April because I wanted to ensure the weather would be warm enough for them to go into the aviary as soon as they were feathered out. For background we are in a 900 sqft 2 bedroom house in an urban area. I do not have the luxury of a barn or garage so I have to plan strategically.
The eggs shipped far faster than I expected, arriving at the post office in less than 48 hours. When I picked them up I stood on the landing dock of our postal service annex for at least 20 minutes as they looked for the shipment. I only mention this because for the first time in weeks it was cold and raining and I wonder if the change in temperature from the warm southwest to cool east coast affected the eggs.
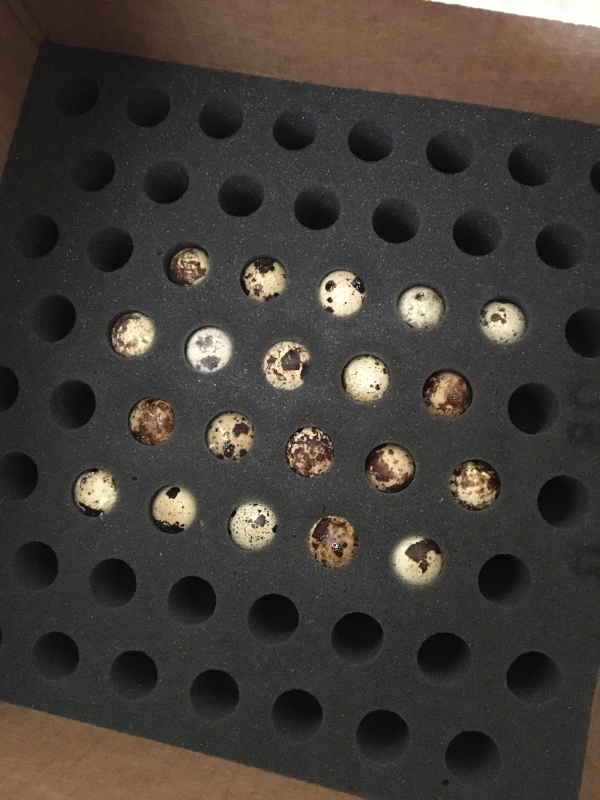
The small, beautifully patterned eggs were packed meticulously; arranged in a grid on a foam block and covered a foot deep in foam cores. I saw no damage or compromise to any of the eggs. We left them on their foam core, pointed side down, for 24 hours to adjust to the ambient temperature and settle after transit.
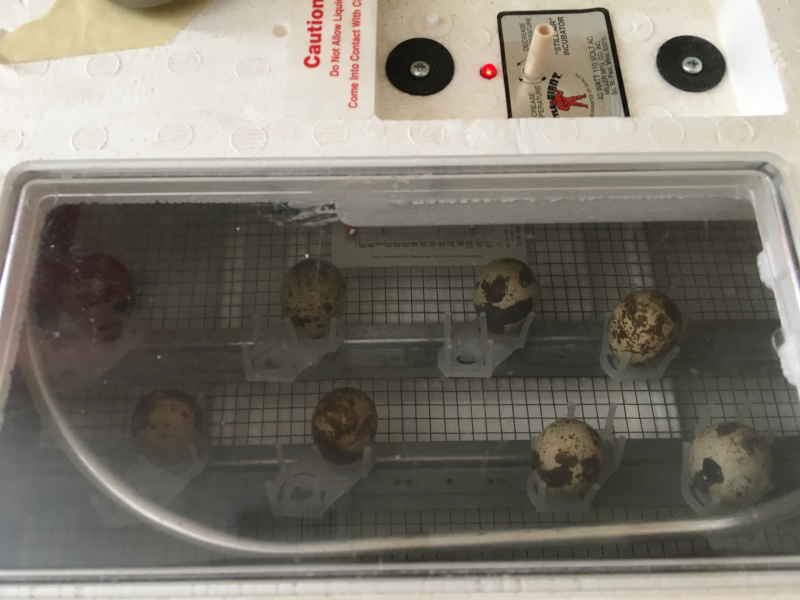
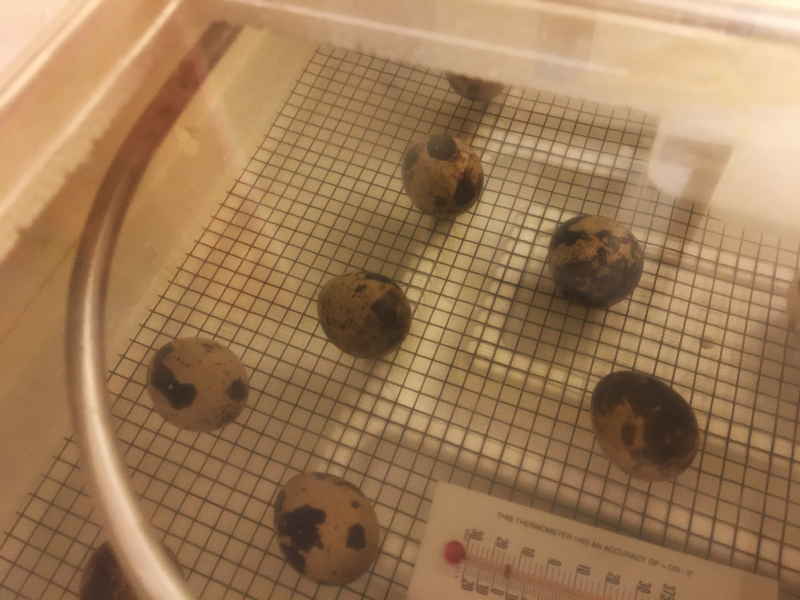
At 11 am the next morning, 24 hours after arriving, with clean and careful hands I loaded each egg into an egg cup and turned on both the incubator and turner. Prior to arriving I tested the incubator to figure out exactly how many milliliters of water to add to get to 40 or 50% humidity and I set the temperature knob exactly where it needed to be to get to 99.5°F. Because of this I was able to avoid fiddling with temperature and humidity once eggs were loaded. I kept both vent holes closed, only opening if the humidity needed to slowly come down.
Days 1 through 14 are when much of the development in the egg takes place. Throughout these 2 weeks I monitored temperature and humidity every few hours throughout the day. There's much debate across the web about temperature and humidity for quail incubation, but rather than guessing at which to go by I instead followed the hatchery's guidelines. The temperature stayed at 99.5°F and humidity around 45%. If I had to add more water to bring up the humidity I used room temperature, filtered water and a syringe - carefully but quickly adding it to the incubator's water trays through the viewing window hole. As the incubation progressed I noticed that both the humidity and temperature slightly increased without intervention, which I assume is because of the increase of body mass within the eggs. This was when I would open a vent hole slightly or adjust the temperature knob if needed.
The Hatch
On Day 15 we set the eggs to lockdown. With clean and careful hands we took each egg from the cups, setting them back on the foam core in the same pointed-end-down position and removed the turner from the incubator. We set each egg horizontally on the metal grate and increased the humidity to around 55%. I removed both vent hole covers to provide the soon-to-hatch chicks with adequate oxygen.
On day 17 the hatching began - the first cheep heard around 830am. One by one they pipped the shell with their tiny egg tooth, unzipped (a fun term used to describe the flap they make to exit the shell), and exited. Once they had pipped the chicks exited the shells pretty quickly, kicking out with their feet and sliding into the world. Within half an hour they were up and drying off. One by one, they hatched like slow-motion popcorn, exploding into the world like they've been here-done-this for millennia.
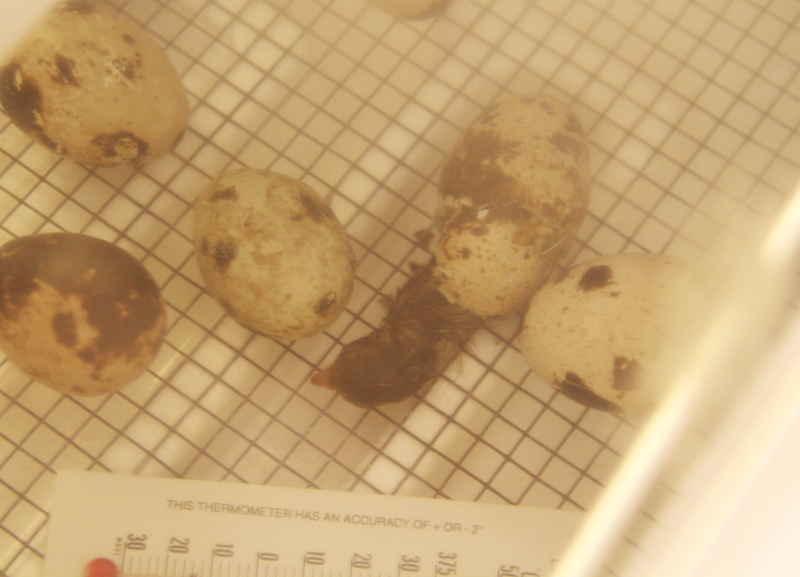
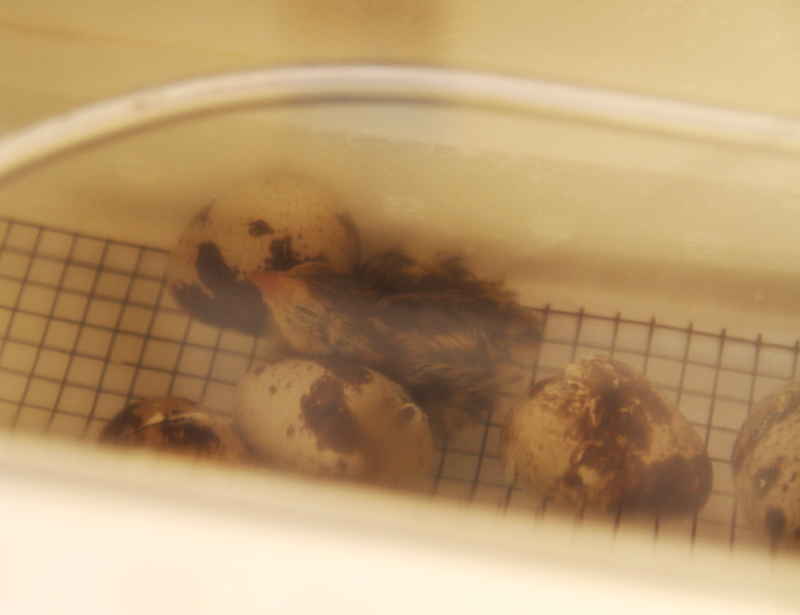
By early afternoon 7 of the 20 chicks had hatched. At this point they are up and running, pommeling each other and the remaining eggs like some kind of infant chick demolition derby. I worried for the chicks not yet hatched getting turned backwards in the shell. I couldn't understand how this wasn't a considered factor in the design of the incubator, nor could I find any similar concerns among hatchers on the internet. Intervening could be catastrophic for both the unhatched eggs and the chicks, so I watched on with bated breath.
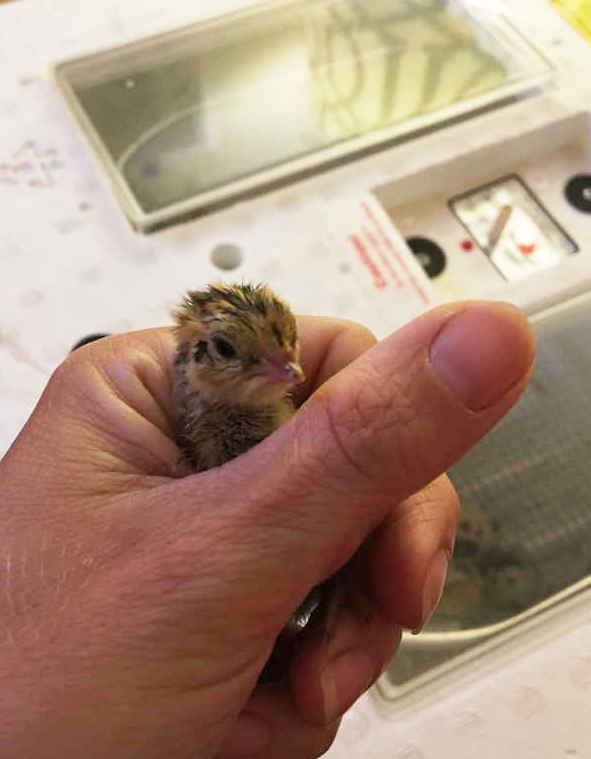
Later that afternoon two eggs pipped but were very slow to hatch. The larger of the two eggs pipped and unzipped but struggled to get out of the shell, pushing with its wings instead of its legs; eventually it made it out and seemed to be fine. The smaller egg was very slow to unzip, but eventually joined the others. We waited 24 hours for the chicks to dry out before moving them to the pre-warmed brooder. I checked for any other pipping, saw none, and moved the 9 chicks quickly to the brooder. Opening the brooder if eggs were pipped can shrink-wrap those attempting to hatch.
Brooding Phase
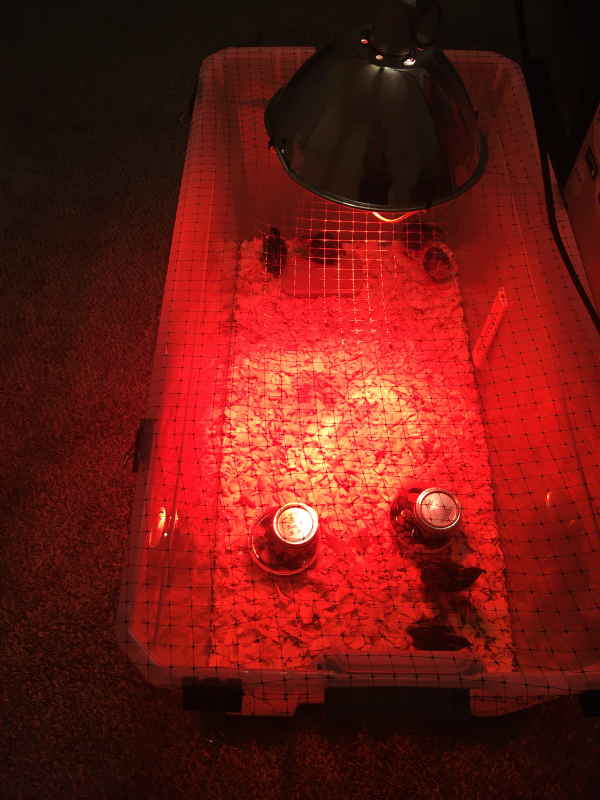
The temperature in the brooder must be warm enough to keep them comfortable as they're unable to regulate their body temperature until they're about 3 weeks old. The first week the brooder should be around 95°F, then reduced 5 degrees per week until 3 weeks of age when it can be removed altogether (so long as the ambient temperature is above 65°F). The coolest area of the brooder, at the perimeter of the heat lamp, should be no less than 85°F until they're fully feathered. Chicks huddled together or excessively cheeping are too cold. Chicks at the far edges, (or heaven forbid panting), are too hot. Chicks moving around, eating, sleeping, exploring, and cheeping occasionally are comfortable.
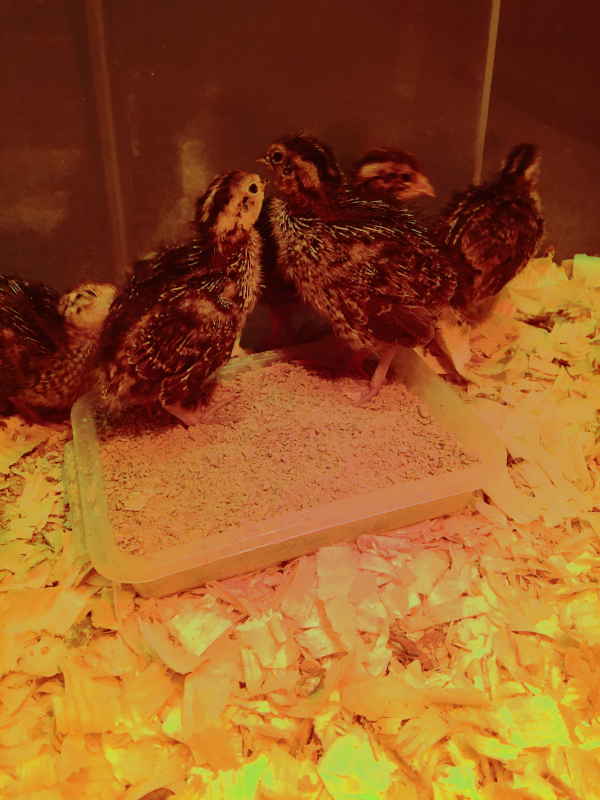
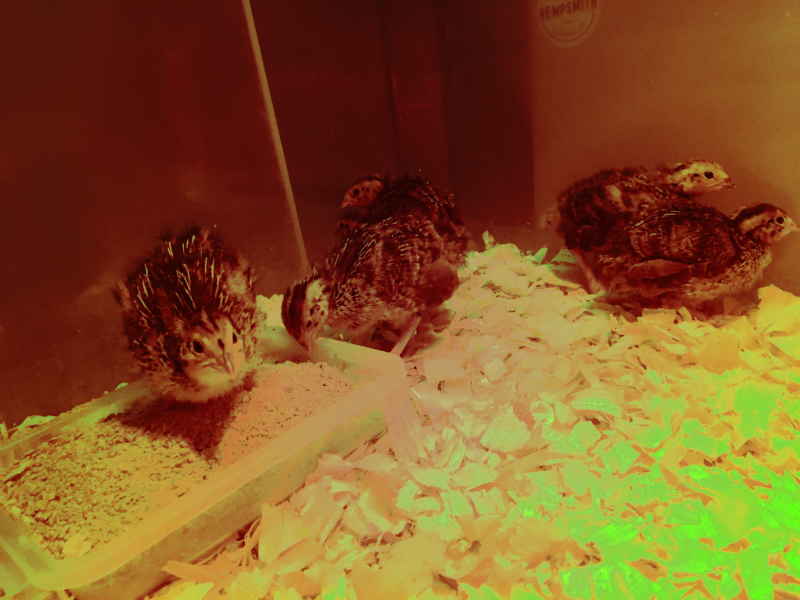
In the brooder we kept a water dish full at all times of room temperature water. We fed a Game Bird 30% protein starter, grinding it in a morter and pestal as the crumbs were too large for these impossibly precious, tiny birds. The base of the brooder was lined with pine shavings. Splayed leg was something I was extremely concerned about and felt that the deep pine shavings I pressed into place offered a steady surface. Within a couple of days I noticed that two of the chicks were not moving or thriving in the same way as the others. They would eat and drink, but move awkwardly and quickly lay back down. Both chicks had a leg pulling away from its body in a way that was obviously incorrect. After reading and researching I thought they both likely had splayed leg, despite my best efforts to prevent it. I bandaged their legs with tiny strips of vet wrap, using the hobbles technique recommended by both the veterinary resources I referenced and a friend who hatches chicks professionally. Immediatey I had to separate them from the other chicks as the purple vet wrap was instantly something to peck and pull at. I created a separate area in the brooder using a couple of thick brown paper bags taped up into a wall. This kept them safe while still having access to the heat lamp.
It took some time for the chicks to adjust to the bandage but once they did it seemed that they had an easier time maneuvering with them on. I was hopeful. Every 12-24 hours I'd remove the bandage and see how they were progressing. Each time I had to rebandage; progress was slow. After 3 days of this I took the bandages off, held up each chick and studied the troubled leg. From the beginning I noticed that the hip bone petruded upward in a way that it did not on the healthier chicks. In studying the leg I could see that the hock was twisted inward, crossing over the other leg. I could find no documentation on this particular deformity anywhere I looked. Because of the rapid rate in which chicks grow it should have corrected itself at this point, if it was going to at all. I read about vitamin deficiencies, which I ruled out, and studied other leg issues among hatched chicks to which there were few positive outcomes. Additionally, despite eating and drinking at a similar rate to the healthy chicks they weren't thriving in the same way. Every time I picked them up to replace the bandage they were calm, easy to handlle - nearly falling asleep in my hand as I did so. Comparatively the other chicks wanted little to do with being held, protesting with strong cheeps and flapping wings.
I have a very difficult time keeping my heart strings untethered to the things in my care. These two were no exception. I wanted so desperately to see them heal, thrive, and live out a life full of quality and comfort. It was hard to accept that the outcome I wanted would not be the outcome I found. I knew that with only one fully functional leg they'd spend more time lying down than moving, leading to numerous health issues, skin and feather abrasion and infection, and potentially being destroyed by the other members of the flock. A prey animal will not survive if compromised and the flock knows this. In the end I elected to relieve them of a life of misery and discomfort. Together with heavy hearts and compassionate hands my husband and I dispatched them humanely and buried them beneath the sweet cherry tree.
The chicks are neat just to watch as they learn and explore life. In the first week they discovered the possibility of flight, hopping around the brooder like popcorn kernals occassionally bumping into one another. They peck at any high-contrast small speck they find. As if in unison they eat, drink, sleep, and cheep all together. Whatever one of them is doing, the others follow. They double in size each week, with pin feathers appearing at the tips of their wings and along their back at about 1 week. Each day I clean out their water dishes, refill the food, and add new pine shavings to keep it as clean as possible. At about 3 weeks old, when evening temps are above 65 and they've been weaned off the heat lamp, they move out into the free-to-forage quail oasis. This will be about the time we can feather sex them, discovering how many hens and roosters we have based on chest feather color. In Jumbo Browns the males have a red chest and the females have a white chest with brown speckles across it.
First Hatch Reflections
Upon reflecting I believe that the two birds with leg deformities were likely the ones who took an exceptionally long time to hatch. I have studied the numerous reasons why chicks are born anatomically compromised and cannot find any step I could have taken differently to ensure a better outcome for them. Things just happen, despite our best efforts or intentions and must be accepted for what they are.
Our hatch rate was far lower than I anticipated - only hatching 9 out of 20 eggs. After giving the remaining eggs an additional 4 days to hatch I terminated the process as none had pipped and none were rocking. Persisting further increases the odds of weak or deformed hatches. I 'egg-topsied' most of the eggs and only found 1 fully developed chick that failed to hatch. The others were all yolk. Perhaps there was damage during shipping, genetic compromise, infertility, or other reasons unknown.
One consideration I have had is whether or not the still-air incubator is adequate. I do not know if every corner of the incubator kept a steady temperature or not. I've seen folks modify the model I have by adding a small computer fan to help circulate the air. Of the 3 thermometers I had in the incubator none read exactly the same, so I took an average or depended on the one I felt was best calibrated. I don't like this level of uncertainty and guesswork. I'm researching other brands of incubators that I know folks have had consistent success with.
Good to know
Incubating eggs is a deeply rewarding experience. The day they hatched will go down as one of my favorite moments in life, both mesmerizing and miraculous. However, for reasons beyond control, chicks can be born in a compromised state and you must be prepared to handle any number of issues. Most commonly, cross-beak, failure of the skull to form, missing or misplaced eyes, leg and neck deformities, curled toes, crippled chicks, unhealed navels, bloated and soft-bodied chicks, chicks covered in membrane, shell, or shrink-wrapped during hatching. I'm grateful our challenges fell at the low end of possible traumas, but admittedly it was still difficult to process.
Quail are far more wild-natured than chickens or other domesticated poultry. Their instincts to survive seem more amped up to me than my experience with chickens. For reasons I cannot explain we had one chick pass away at 5 days old after being held briefly just to check it over. They're delicate, wild, fascinating, jurassic, unpredictable creatures. For two years I did so much research and learning about incubating and hatching quail prior to ordering eggs. I studied temperature, humidity, incubation issues (as listed above), different incubator types, breeds, genetics, disposition, feed, caging and pens, diseases, treatments and triage, and more. Exotic veterinarians will work on chickens, quail, ducks, etc but you'll likely pay a minimum of $150 to walk in the door per bird. As a homesteader this is a difficult, if not impossible, cost to justify. Do your research, be prepared, and be ready to experience both the joy and responsibility that come along with hatching chicks.